I spent almost half an hour to set it up. The whole setup process was spending less then 5 minutes and the rest of the time almost spent in googling and blogging.
I am going to guide you a straight forward way to setup it all up.
Install new software
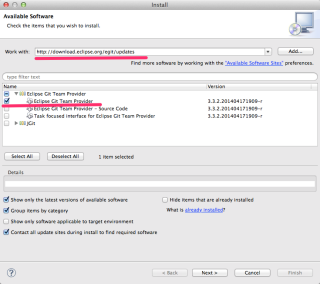
- On menu bar, go to Help -> Install New Software…
- Type http://download.eclipse.org/egit/updates into Works with and press enter key. (Don’t need to press Add… button)
- Then, you will see Eclipse Git team provider. Check Eclipse Git.
Done ?!
Yes! It is done! You can check it by About ADT.
Show Git on menu bar (Optional)
You can setup git on your menu bar by a few steps
- On menu bar, go to Windows -> Customize Perspective
- Select Command Groups Availability tab and scroll down Available command groups and check Git. Then click OK button
Then you will see the git show on menu bar.
Setup git for exists project
- Right click the target project.
- Go to Team -> Share Project…
- Click Create button and select the repository path where .git file going to be created. Then click Finish button.
* Create git repository at different workspace from Eclipse workspace is recommended, but if you are retain to do so, check Use or create repository in parent folder of project.
End of article
If you have received no error from eclipse. You are successfully install EGit into your ADT.
Happy coding.


